Pages

Saturday, September 29, 2012

Paper Mache Skull of Skeleton part 1

I have a couple skulls that I have kept over the last couple of years.  This year I learned (thank you Pinterest) that you can make paper mache skulls easily and don't need to spend any more money!  This was great since I am doing a haunted house with my good friend, I would like to keep my budget under $100.  So I did this two ways.  I wrapped one skull tightly with cling wrap and the other one I didn't.  The one I did, it was a foam skull so I was protecting it.  the other one was a plastc one from the dollar store and the paint peeled off a little but it still looks good.  Also this will take about 5 layers so you may wnat to do this way ahead of time of when you need it.  This is a 2 process project.  I let it sit out all day and over night and I think it was still a little wet underneath.  So give it about 2 days so yo don't ruin all your hard work. 

The next part can me tricky and bad words may come out of your mouth but don't fret.  Take a craft knife and cut around the back of the skull and take that off, then peel the front off.  You may have some breakage or cracking other wise like I did, but it was easily fixed with glue and will be covered up in the "skinning" process of this fun craft.


I painted the skull with many brown and black colors creating dimension.  I used acryllic craft paint.  Allisandria helped paint and it was perfect.  She had been so excited to paint the masks.  Kids can't really screw this up, even with a broken arm like she has.  I then did all the shading in the right spots after I let her put the first couple layers on. 
"Skinning" the Skull
Now this technique I found on the internet but non of the 5 posts i found had any pictures describing.  Since I am not a reader and more of a looker, it took me forever to focus and read through my excitment. So I thought I would do picture tutorial for you.

Get some glue, elmers glue or mod podge would probaby work.  The posts I found used carpet latex?  Don't know what it is, don't have it and ddn't have time to take another trip to the store.  I used hot glue and it worked just fine!!
Start at the mouth.  Take little peices of paper towel and twist and glue them over the mouth.  countinue by making wrinkles and such all over the skull.  leave out the eyes and the nose. 


When you paint it it looks like old leathered skin.  Great for a partially preserved corpse right?  This will also help attach any loose PT that didn't get hit with the glue.  Paint really good in all the cracks.

Since I am a hairstylist, I had some extra hair extension peices from clients.  I had the girls roll the hair up and tangle it in their hands then I glued random little peices on the skull.  Isn't that awesome?

Enjoy.  I love paper mache.  I keep thinking of all the fun things I can do with it!

Monday, September 24, 2012

Oven Mitt Mini size for your little Mini

Another thing crossed off my handmade Christmas list for the girls.  Allisandria keeps steeling my oven mit for her kitchen.  she has a hot pad and her own towels, but she always wants MY oven mitt.  So Dave gave me the bright idea to make the girls each their own.  Fantastic!  He really does have good ideas!  I just don't admit it as often as I should.  But this one I will.


For the pattern I traced loosely around my hand.  I figured once it is all sewn up it will shrink to the perfect size for my girls.  I was right.

Now after you cut out your pattern cut two peices of fabric, then another two on white for the inside of the mitt. 4 peices all together.


cut 2 peices from batting and place it inbetween a patterned peice and a white peice.  Right sides facing out.


Sew along the edge of teh entire mitt.  repeat for the other mitt as well.  Sew using a 1/4 in SA.  As close to the edge as you can.


Now take the two mitt sides and put white sides together.  pin it in place.

 I made some bias tape using Dana's Tutorial HERE and pinned it to the mitt, but leaving the bottom .

Carefully sew the bias tape on close to the edge as you can get assuring you are sewing it on the other side as well.  This was tricky for me cause I don't use a lot of bias tape.  especially the really small.  I think mine is either 1/4 or 1/2 inch.  really tiny.

When I got to the bottom (the opening of the mitt where you slide your hand in,) I sewed the tape one side at a time working in a circular motion.

when I got to the end of the mitt, I continued to stitch the bias tape close and trimmed it from the rest that I made. 

I made a little hanging loop and stitched it to the mitt.


It worked out pretty well.  The next one will probably be better on the bias tape.  I am not very skilled on that technique yet.  Oh well.  The girls won't judge. 
ENJOY!

Saturday, September 22, 2012

Barbie Chair & Ottoman

Loooved doing this.  I can't wait to make the other stuff.  I love adding to my Barbie collection.  The dresses and the beds are just a couple other things I have made for miss Barbie.  Actually its mostly Disney Princess "barbies" at my house.  So wether its Barbie and the Popstar or Cinderella...This will work!


I purchased some foam blocks from the dollar store.  Cut them using a knif into the shafe I wanted.  This is a messy way to go around doing it, so if foam dust aint your thing, use card board!  I covered my chair in a random way that is why I didn't show any pictures.  I just made sure no foam was showing and since I used a chevron print, I made sure it was straight and aligned correctly.  Use Hot glue to secure everywhere.  You don't want picky fingers to peel apart your materpeice.


For the ottoman, I used the foam peice I cut out of the chair.  Make a pillow out of scrap fabric that will fit the top of the foam.


Choose your coordinating fabric to the chair and cut a large square that will fit completely around the ottoman. 


Using your hot glue, wrap it up like a present!  Don't pull too tight though cause you don't want to flatten your cushion too much.


Make a cute pillow for your chair and hot glue it securly to the chair.  You don't want to lose thing cute things.


I had a left over doiley so that will serve as a rug.  Cute huh??
ENJOY!

Monday, September 17, 2012

Easy Toy Sinch Bag

I have made many variations of these bags.  They are simple and super handy.  They are great to put birthday gifts in, toys, toy cars, army men, nerf gun stuff, paper dolls...anything.  I had made paper dolls for my daughters birthday this year and had this handy bag to go along with it. 


So once you have determined what will be going inside your bag, cut two squares the size you want.

Sew right sides together leaving the top open.


using your botton whole foot, designate the center top of one of the sides of the bag and mark.


create two medium to large button holes beside one another.


carefully use your seam ripper to cut in between the stitches of your button holes to make them open.


make a casing by folding the opening down so your folding in the middle of the button holes. 


sew all the way around the edge. 


grab some t shirt scraps or ribbon, rope...whatever. 

Run it through one button hole and out the other


Saturday, September 15, 2012

Summer Strawberry Salad with Raspberry Dressing

Yeah.....my lunches needed a makeover.  Sandwiches and leftovers weren't making me feel great after bustin tail at the gym.  So I have been eating salads..  Which in turn has forced me to be creative with them.  This one is a favorite.  Strawberries, chopped pecans, Gargonzola cheese, spinach, lettuce and Ken's Light Raspberry Walnut dressing.  SOOOO good!!!


We love strawberries at our house!
Enjoy!!

Thursday, September 13, 2012

Barbie Bed and Bedding-Handmade Christmas

I am so excited to get started on the girls Christmas stuff.  I am doing a bunch of barbie stuff, like the dresses i made HERE.  In addition to those sweet dresses, I am making a doll house and furnature.  Today it is the Bedding!!!  Oh i love it.
All of this fun stuff has come from inspiration from this sweet Doll House I pinned on Pinterest!! HERE.  She has done the most creative Doll house I have ever seen!  I will be making the doll house as well.

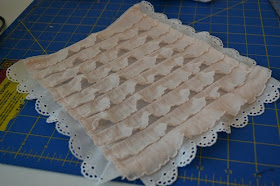
This will be basically a small pillow style bed.  so cut two peices of 8x11 inches fabric.


Sew together leaving a couple inch opening so you can stuff with Poly fill.


sew the opening closed using a top stitch.  simple :)


Now for the pillows, cut 3x4 inch squares.  Sew right sides together, turn inside out, stuff and stitch closed.


For the bed spread, cut fabric so it is just going over the edges of the bed.  Add any decoration you wish.  I loved this,  I am kind of making my dream bedroom miniature style.  So get your interior design juices flowing!!!


wasn't that fun?  I can't wait to make the other bed for my other daughter.  Ohhh the endless possibilitites!
Enjoy!!