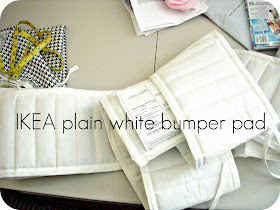
Have you ever made a whole bumper bad from scratch using the foam bumper inserts from the sewing store? That is what I have always done. Its nice, but sometimes when you want to add binding, it is too thick and seams to put a lot of stress on your machine. So while browsing IKEA one fine day with my cute friend, Brittany (hey girl), we found that they had PLAIN WHITE PADS!!! Immediately that thing got thrown in my cart and I had ideas of painting stripes using my painters tape method found HERE and HERE.
I tried that...but got scared pretty much knowing that it would fail because as you can see, the pad has lots of seams down it...that would welcome lots of bleeding stripes...not good!
So I let them sit for a while trying to think what the heck was to become of this $15 treasure...I remember I bought some grey fabric. PERFECT!! So now I will be showing you how you can pretty much made your own bumper pad for cheap and easier on your machine!!! We embellished everything else, why not a bumper pad?
Now this tutorial is me just doing the fabric on the outside of the bumper, if you want a double sided/printed bumper, then repeat all the steps for the other side.
These bumpers are all one long peice. So it is pretty long.
Feel Free to make your own cute ties to add more color and funness to your bumper...Of course I am going plain and simple so I stuck with what already came with the bumper...Plus that means less cutting and sewing.
sorry I dont' have good pictures of it on the crib, bad time of day and bad lighting, but I wanted you to see the bigger idea of it on the crib.
ENJOY!!


No comments:
Post a Comment