I can't believe I did it. This has something I have toyed around with in my head since I started making clothes. After seeing the top on pinterest (above..I wish that was me) I decided to go for it! The last few swim suit seasons have been so depressing for me. Nothing fits, and with waterpark season passes, I didn't want to look like those ladies that have way to much showing. So I have been wearing swim suit dresses/coverups. Not ideal for me, cuase usually I wear my body with pride. Not this year. After nursing my son and working out faithfully for months, no weight was falling off, and still isn't after I stopped nursing. My ego is crushed and swimsuits are making me feel ridiculous and embarrased. So this was a great problem solver. I have a suit that fits me perfectly, one of a kind and I even went without wearing a cover up at the water park. Now don't be intimated. This isn't as hard as it may seam.

Start by using a pair of underwear or swim bottoms you already have. Make a pattern by folding them in half in the front and the back side. Add Seam allowance. Mark your pattern accordingly then cut out.
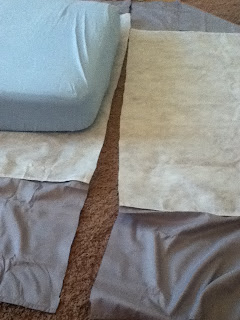
Start cutting out your fabric. When cutting the lining you want it a tad smaller than the lycra, so when it's wet, it doesn't slouch through and look like you hald toilet paper hangin from your bum. So when you have cut out the lining just trim around all the edges about 1/4 inch.
Right sides together, sew the bottoms together at the crotch, repeat for the lining as well. Then place the lining on the inside of the bottoms, fold and pin the crotch to the leg openings, folding over the lining. The fold should be about the amount of your Seam allowance you added when making your pattern.
Using a zig zag stitch is best for this and youll notice on your old swim suits it is used, it stretches.
Then sew the sides Right sides together, then fold down the top and make your waist band. You can add a little elastic here too if you want. Remember this will stretch when it is wet so make sure the suit is a little snug when fitting it.
I then cut two long strips of the contrasting color to use as ties. They don't serve a purpose, but I like the way they look. I sewed them down so they won't go anywhere, then I tied them in a bow.
TOP
Now for the cutest part! the Top!. Measure around your bust. Take that number and minus 3 inches or so. Then add room for seam allowance. Measure from the top of your chest to under neath your bust to see how wide you need to make your bandeau top. Cut Two contrasting fabrics with the proper measurements.
Add and sew the lining. remember to make the lining slightly smaller.
wrap the peices around each other so the right colors are back together.
you will have two strips per color. You need to match right sides together and sew a seam. sewing as close to the knot in the middle as possible so your boobies don't show :)
If you are using this as a bikini, add straps or a halter if you wish then just tie everything together in the back.
To add a Tankini:
Now measure under your bust right at the top of your rib cage take a way 3 inches then add seam allowance, Measure around where ever you want the bottom of your tank to hang. Cut your fabric so the top portion gradually goes to the width of the bottom portion. Cut the lining a few inches shorter than the waist of the tankini.
Now this next part can be tricky if your not paying attention. Stack the swim suit fabric rights sides together, puting your front peice on top if your using contrasting colors, then lay the lining on top of that front peice. Sew the sides together using a straight stitch. Turn right side out.
Turn the top inside out and place right sides together of the tank to the top and sew using a zig zag stitch. Carefully and slowly around the knot area. Stop at the sides where you are tieing in the back. You will the fold the top of the tank in the back over and make a hem. Not sewing/attaching it to the ties. Fold the bottom making a hem using a zig zag stitch, add your straps/halter and your done! The bandaue was a little tricky when sewing to a tank, but other than that it was quite simple.


**New alterations. After swiming in my suit and seeing the stretch, I took in my bottoms on the sides another inch so they were a little more snug. I added an underwire bra to my top by carefully hand sewing it in, for added support, plus the peach material was kind of see through when wet. Luckily I was at a friends house and I was wearing padding inserts from another swimsuit, they were black, and yes you could see them on the peach side of the bust. lol! All is well aftger my alterations. I have more fabric so I will be making more suits!!!!

.JPG)
.JPG)
.JPG)


.jpg)


